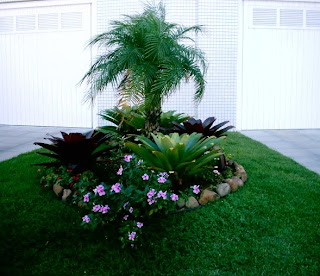
Wednesday, September 8, 2010

Parsley


Well, I am finally getting around to writing another post. After nearly three months away, I'm now back to blogging...which I surely missed, in spite of the excitement the projects I got involved with brought about.

So, here I am again to share with you great ideas FOR and FROM the garden. 

And it was by looking at my garden that I chose today's topic: parsley.

It looked so green and vibrant that I couldn't help taking a few pictures
to post here.


Parsley is a multi-purpose herb you shouldn't do without in your kitchen.


Often regarded as a simple table garnish, parsley is much more than that. Besides its delicious taste, parsley is highly nutritious, and has healing properties as well.

Very few people know that, but a serving of parsley contains vitamins   K, C, and A plus folate and iron.

As to preparation, the list is endless: you may use parsley in fresh salads, soups, and sauces. Chopped and mixed with melted butter, it is wonderful over fish or to glaze vegetables. It may also accompany chicken, veal, and other meat if you briefly deep-fry it and serve as vegetable.

You may easily grow parsley as it doesn't require any special care save sunshine, water and good soil...just like any other herb.

Tuesday, June 15, 2010

Pools And Fountains In The Garden


It’s been 13 days now since the last post but it seems I haven’t written in ages. Over the web, where instant communication is king, time has another dimension. One day or even a few hours away from the online world might appear that you’ve been away for months. It’ s amazing, isn’t it?
Well, such subject could lead us to an interesting discussion about how we spend our time ( or waste it ), how precious time becomes as years go by, how fast it is passing these days… But this isn’t our purpose here. On this blog, you and I address a more permanent stuff, right?
Ok,  before it’s too late, let’s get back to the blog theme and see some ideas to make your garden look prettier this summer. Yeah! Summer is just round the corner, and with it comes heat…
So, you might want to bring relief from the heat by using any form of water source in the garden, especially water in movement. The sound of running water is soothing , ideal for an end-of-workday family gathering.
A garden pool, a splashing fountain or a narrow little brook running through the grounds are some ideas that may be easily implemented.
A pool in the garden highlights the good features of your setting, and it should always be placed in the central part so that its surface will be seen from several points, or at least from the most frequented spot in the garden.

Make sure you choose both the appropriate shape and materials of the coping around the pool. Flagstone, brick and tile are all good depending on the degree of formality of the pool. Sometimes the best solution is no visible coping.

As to fountains, they  can be made with only a small supply of flowing water, and the same water can be used over and over if you install a small motor and pump for an electric pumping system. You might need extra help to do that but it’s all inexpensive while the final effect is awesome and worth your effort.

Wednesday, June 2, 2010

Three Steps To A Healthy Lawn


Nineteen days from now summertime will be knocking at our doors.  Thinking about packing up and going   somewhere to enjoy vacation with your family? Nice, but before doing that, take some time and  look around your lawn and check (in case you haven’t done it yet ) whether  it needs some maintenance. Oh, you might say, I’ll hire someone to take care of it, it’s so much work, a time-consuming task, I can’t do it myself.
Well, actually, it’s not as hard as you believe. Once you have a few guidelines and tips – and some spare time -  you may easily get a healthy green lawn just in time for the first backyard BBQ of the season.
Let’s see what should be done :
1.       Revive your lawn by fertilizing it properly. Fertilizer is the key to ensuring strong healthy growth of the yard grass which will grow greener and thicker. 

Typically, you want to fertilize two times a year. If you’re less concerned about perfection, in the north you can get away with feeding just once a year: in the spring or fall. In the south, with its longer growing season, you will need to feed twice, spring and fall.

Start in early spring, approximately 30 days before the growing season begins in your area, continuing through the growing season until fall. But be careful, though: don’t use too much fertilizer.

If you’d like to fertilize organically, check out the variety of organic products at your garden center. Or, just rake 1/4 inch of compost atop the soil.

2.       Mow your lawn properly, that is, do not cut too much off the grass top. Instead, set the mower  to a mid-position so you won’t “scalp” the lawn, which can be disastrous. (Check out the post of May 6th)

3.      Also remember to control the weeds by pulling or digging them, being sure to get as much of the root as possible. If you fail to get enough of the root, you will simply be doing a prune job. With dandelions in particular, it’s important to get at least the top inch of the plant’s long, narrow taproot.

With these tips you are ready to take care of your lawn and make it the perfect place for summer gatherings. 
You may want to check out May 6 post for other ideas.

Thursday, May 27, 2010

Grow Your Own Cooking Herbs


Growing  your own culinary herbs will bring you extra pleasure when serving your family and guests that special dish seasoned with the herbs.
Unlike spices, which are generally more pungent and add stronger flavor, herbs  add subtle flavor that account for the success of your mouth-watering dishes.
It is easy to achieve those results as any location with plenty of light, drainage and nutrition is adequate to growing cooking herbs. You may choose to grow them in outdoor garden spots, in patio containers, in greenhouses or you could even make an indoor herb garden using pots. A good idea for small areas is to plant the herbs in hanging baskets, which will add extra charm to the place.
Among the various cultivars, you may choose thyme, coriander, French lavender, bay laurel, basil, lemon verbena, dill, parsley, chives, sage and rosemary if the amount of sun they will get is south or westward . A nice combination of both upright and trailing herbs is attractive, so consider adding creeping thymes or oregano to your mini garden for a little eye appeal.
Northern and eastern exposures will provide more shade and are not as warm. Shade loving plants that will work nice here include parsley, spearmint, peppermint, lemon balm, chives, borage, and Cuban oregano.
To be successful with your herb garden, make sure 1) you choose a spot that gets at least 6 hours of sunlight per day, 2) there is good drainage and easy accessibility, and 3) the height and sizes of herbs are considered so that the largest ones will be placed at the back and the smallest ones in front of them.
Finally, remember to skirt your cooking herbs with a two to three-inch layer of mulch, which helps the soil to retain moisture besides keeping the neutral-to-slightly alkaline soil that most herbs prefer.


Sunday, May 23, 2010

A Multicolored Garden


There is nothing more eye-catching than a multicolored garden.


Whether you choose to have flower-beds with only one flower type or with various ones, the resulting look will be just as gorgeous.


Take a look at these photos and get inspired to go outside and start creating your dream garden.

Wednesday, May 19, 2010

Begonias, Tulips, Daffodils - Bulbs For The Garden


Experts say that the secret to a beautiful garden is in the bulbs. One of the reasons that account for bulbs preference among more experienced gardeners is that bulbs naturally package all the essentials they need to flourish and grow. They are usually quite hardy and undemanding and can provide the most amazing shower of spring and summertime colors as a wide variety of colors and shapes can be produced. All that’s required is warming temperatures to bring the bulbs out of dormancy. 


You can easily find bulbs such as daffodil, crocus, hyacinth, tulip, and lily at your local lawn and garden center. However, if you want something rarer, you should 

 look for flowering bulbs with unique colors and smells like Guinevere, Blackmore, and Landon Begonias.

For spring-flowering bulbs, you will plant in fall while for summer-flowering 

bulbs, the ideal time to plant is spring. Most bulbs do well in pots or in planters, so your main concern should be the type of soil required and the depth and spacing necessary to give your new bulbs plenty of growing room. After following the necessary steps, your garden will be blooming with flowers that will catch everyone’s eyes. Enjoy!

Wednesday, May 12, 2010

Organic Rooting Hormone


While commercial rooting hormones may be more practical for obvious reasons, their organic homemade counterpart is certainly healthier and less expensive. You may obtain an efficient  organic rooting hormone by soaking the yellow-tipped shoots of a weeping willow tree in water or by making a tea from the willow bark. Make sure you will use the mixture after a 24-hour period. Another way of getting rooting hormone is by using honey dilluted in some water.
You may use the organic rooting hormone to propagate any plant with leaves such as African Violet, Geranium, and others that can be propagated with leaf cuttings.
 Your gardening experience will be far more rewarding if you pay special attention to and care for the environment.

Saturday, May 8, 2010

Turn Your Garden Into an Outdoor Living-Room

How about having your living-room or dining-room and even your bedroom or your children's bedrooms flow right outdoors on to "floating" decks of wood, bricked terraces or lattice-roofed loggias? It sounds like a good idea, doesn't it? Your garden as an extension to your house, a terrace for family gatherings, a play space for young children. All of these will be just fine especially now that the weather is getting warmer and summertime is approaching.


The ideas are numerous and go from simple tricks such as glass walls to the "parasol" roof, which may extend some 4 feet from the walls of the house.

As for glass walls, you will want to use the same wall material inside as for a continuing wall on the terrace and the same material for the ceiling both inside and on the extended terrace eaves. This will give a sense of unity to the adjoined area.


Relate your terrace to the rest of your grounds with flowers and vines grown in pots, baskets and tubs, thus making it a delightful place for entertaining, sun-bathing and relaxing.


Don’t forget to have an electric outlet for lighting, portable radio, electric spit for your barbecue, etc installed, so you, your family and friends will make the most of this outdoor living-room in warm evenings as well.


The better you plan and the more you care for your terrace, the more your family will enjoy gathering there for a chat in lazy summer days.

Thursday, May 6, 2010

How To Get A Great Lawn

A well-cared lawn makes a relaxing view as one feels like lying on it. How hard is it, though, to have a nice-looking lawn?

It's not at all difficult  as long as you follow some basic steps.

First of all, start with a solid plan. If you need to plant grass, do
some research on the best seed for your area, where to buy it cheap, and when it's available. Depending on where you live, you'll plant either cool season or warm season grass.

Cool season grass, planted in northern areas, is usually best planted in early fall, but if you missed planting then, plant it in the spring when soil temperatures reach 50 F.

Warm season grass needs soil temps of 70F to thrive and is the choice for southern plantings. Don't make the mistake of thinking you can plant warm season grass in the upper Midwest. Warm season grasses are bred to thrive in southern climates and are not winter hardy in the north.

Secondly,  new grass plantings must be kept moist, but once grass reaches a height of three inches, you'll have to water it deeply once a week.

Now, if you already have a lawn, then this is the ideal time (spring) to aerate it  while it's still moist and before the spring rains are done.

Why is aerating your lawn important? Because in the springtime it gives microbes and other small life forms a breath of fresh air after winter. Aeration also makes new paths for drainage and keeps your lawn from becoming saturated.

The next tip is proper fertilization, which means you will avoid using chemicals. Instead, feed your soil with nutrient rich compost and let your lawn get its nutrients the natural way. 


The fifth tip for a great lawn is to mow your grass high. A 2 ½ to 3-inch high cut makes your lawn look fuller, feel softer, and helps keep it healthy. Taller grass shades pesky weed seeds and keeps them from getting established. In addition, a taller lawn is better able to absorb sunshine and better able to retain moisture, the two main contributors to a healthy lawn.

Last but not least, enjoy your lawn. Sit back, call your family and feel the bliss your well-cared yard will bring you.


Tuesday, May 4, 2010

How To Get Rid Of Ants - Without Poison


 Today's post - How To Get Rid Of Ants - will be useful if you are fighting ants in the house and if they are damaging your garden as well.

Ants, like any other insects, are not welcome in the house...not at all. Indeed, they are a nuisance because they bring a lot of bacteria into your kitchen counters, cupboards, and pantries. So you will want to keep them away, preventing them from entering your home.

There are several efficient homemade recipes, all poisonless, that you may apply to get rid of those insects, which are nice in Aesop's fable only.

One recipe to repel ants can be made by adding to an eight-ounce bottle of mild liquid soap one ounce each of citronella, pennyroyal, peppermint, cinnamon, rose and tea oil. Mix together and add three tablespoons of the mixture to two cups of water. Spray where ants are entering the house as well as garbage and recycling bins. You may also use this formula to wash the kitchen counters but, in this case, only use one-half tablespoon to two cups of water.

Another mixture to be used for repelling ants might be a solution of vinegar and water, which they find repulsive.

Also powdered cloves or red peppers sprinkled on the surface where ants are found work well as these insects are fastidious and won't come back to where those hot spices can get on their feet and antennae.


Last but not least, make sure the kitchen counter is free of food crumbs as this is what attracts ants. Keeping the place clean will certainly stop them from coming inside.


Friday, April 30, 2010

Floral Design Arrangements - Your New Hobby

Ok. You are not yet convinced that growing a bonsai tree may bring you joy and pride after a couple of years (and will keep you busy in the meantime!) - in case you start off from a single seed, or sooner if you get a young bonsai and carefully follow the so-called masters' secrets.Whichever you choose, though, will surely be an accomplishment in your life.


Still, you are thinking that it is too much work, that it is not worth it. In this case, you may take up another hobby - floral arrangements - and maybe turn it into an extra income. Not only will you be surprised with your own talent, as you learn how to design the arrangements, but you will also add a positive pastime (or extra earnings) into your routine.

Wednesday, April 28, 2010

Bonsai Trees - How To Grow Them


After writing the post on bonsai trees, I felt compelled to grow my own bonsai. It's something I've always thought of doing but never accomplished. The reasons for this failure vary from procrastination itself (which is no good thing to do) to a feeling of being unable to properly grow and care for a bonsai tree. Unfounded excuses because, as long as you have the right information and follow the required steps, you are likely to succeed getting your bonsai.

While mine is still a seed to be sown in good soil, I admire ancient bonsai trees, carefully cultivated by Asian masters, such as the ones displayed on this page. They are all over 80 years old.


Saturday, April 24, 2010

How To Grow Bonsai Trees


Originally from China, the art of bonsai was developed by the Japanese who have a special preference for bamboos (take), plum trees, cherry trees (sakura) and pine trees (matsu). The word bonsai literally means "tree in a pot" and, for the plant to be considered a bonsai it must represent the tree exactly as it is found in nature.

Growing bonsai trees may be a challenging task because it requires some special skills but, once you learn the basics and give your bonsai proper care, you will most likely feel extremely rewarded and proud of your accomplishment.

 Bonsai trees are usually more difficult to care for than the regular plants you have in your garden. This is because there are a few important details to be observed such as having the right bonsai soil (which is designed to dry out more easily than standard houseplant soil) and the right type of pot to match the size and shape of the bonsai. Besides these two, let's say, basic aspects to get started, you should be prepared to learn how to prune and when to prune your bonsai as pruning is crucial to achieving a perfected miniature. You will have to prune the roots and branches, wire the trunk and branches, and use other techniques to make the tree look like a mature tree.

Since bonsai trees are real trees, they should not be kept indoors in the winter because they need sunlight to grow, and, to keep them as healthy as possible, remember that bonsai trees require frequent small watering. Moreover, in the spring and fall, you must feed them with nitrogen, phosphoric acid and potash.

As said above, the art of bonsai may be a rewarding experience as long as you dedicate some time to learn the secrets behind successfully grown bonsai trees. Among the numerous publications on the issue, there is this one that may be just as handy to help you get started: Beautiful Bonsai Secrets.


Wednesday, April 21, 2010

Earth Day 2010


Everyone is invited to take some kind of eco-friendly action to celebrate the 40th anniversary of Earth Day. 

It goes without saying that any action will add to the global movement: from recycling plastic bottles to carpooling, from saving water to adopting a simpler lifestyle, anything will surely make a substantial difference in the end. The future generations will either thank us or curse us - that will depend on what we do now.


A visit to the Earth Day website will be worth it as the site shows a good number of ideas, call for actions, pledges from all over the world, assuring that there is a concern towards our planet's health at every corner of the globe.


TAKE ACTION!

Thursday, April 15, 2010


"Adopt the pace of nature: her secret is patience."

Wednesday, April 14, 2010

How To Attract Hummingbirds To Your Garden - Part Three

 This is the last part of "How To Attract Hummingbirds". After following the tips you will most likely be pleased with your new visitors and your garden will look far more nicer.

"You can also tie 18 to 24 inch strips of red ribbon to the feeder. The blowing ribbons will make it easier for the hummingbirds to see.

Place feeders at various heights. Some hummingbird species like to feed at heights of 12 to 15 feet, while others feed on low growing flowers and prefer feeders placed closer to the ground.

Avoid hanging feeders in direct sunlight, which will cause nectar to spoil more quickly.

Once a week the feeder must be washed with vinegar and water or a 10% chlorine solution and scrubbed clean.

Create a separate feeder for Bees and wasps. Fill it with a mixture of 3:1 or even a 2:1 ratio of water to sugar. The insects have a very strong preference for rich, high-sugar mixtures and will quickly decide to use the feeder with the higher sugar content.

To repel ants, apply vinegar or powdered cloves to ant trails. Put adhesive tape applied sticky-side-out to the
hanging wire. Experts advise that petroleum jelly not be used because the greasy substance gets onto the birds and make it hard for the birds to clean their feathers properly. Use ant traps instead."

For more information visit:

http://www.apluswriting.net/garden/hummingbird.htm

About the author:

Author: Marilyn Pokorney
Freelance writer of science, nature, animals and the
environment.
Also loves crafts, gardening, and reading.
Website: http://www.apluswriting.net

Sunday, April 11, 2010

How To Attract Hummingbirds To Your Garden - Part Two

Today I'm posting the second part of the article by Marilyn Pokorney on How to Attract Hummingbirds to Your Garden. It's  interesting to read all the advice she gives because most of it seems obvious but is often overlooked by gardeners - amateurs and pros as well. So if you want to see your garden being visited by hummingbirds, make sure you follow the tips below.


"Avoid pesticides. These chemicals kill the insects that hummingbirds eat for protein and can also sicken or kill the birds.

Add plenty of places for the birds to perch. Hummingbirds spend around 80% of their time sitting on twigs, shrubs, and other available resting places.

Provide red hummingbird feeders hung about thirty feet apart throughout your yard. Never fill your feeders with anything but a sugar-water mix of 1 part white sugar to 4 parts boiled water. Do not use food coloring or artificial sweeteners of any kind, and never, never use honey which can develop a fungus which can be fatal to hummingbirds. Clean and refill the feeders every 3 days. More often if temperatures are above 85 degrees F.

Hang the feeders on a pole in a flower bed or on a porch or deck near flowers hummingbirds are attracted to".


(to be continued)


About the author:

Author: Marilyn Pokorney
Freelance writer of science, nature, animals and the
environment.
Also loves crafts, gardening, and reading.
Website: http://www.apluswriting.net/


Friday, April 9, 2010

How To Attract Hummingbirds To Your Garden - Part One


Hummingbirds are specially welcome to any garden, be it a small one or a large yard. They positively add to the spot you grow so carefully. Below you will find some ideas by Marilyn Pokorney on how to attract those cute critters. 

Part One

"Planting a garden full of red flowers is the best way to attract these beautiful jeweled birds.

Plant bee balm, butterfly weed, columbine, cardinal Flower, coral bells, cosmos, dahlias, four-o'-clock's, fuchsias, morning glory, petunias, zinnias, trumpet vine, or honeysuckle. A web search will reveal many more.

Be a hummingbird magnet by having as much red in your backyard as possible. Besides flowers use gazing balls, backyard furniture, ribbons, and other yard decorations. Create both sun and shade areas in your hummingbird garden. Offer an abundance of nesting materials to encourage nesting
females. Hummingbirds prefer downy like materials, spider webs, ferns, moss and lichens for their nests.
Make certain that there is always fresh water available for drinking as well as for bathing. Set up misters. Hummingbirds love to take "leaf baths," rubbing against wet leaves or just sitting on a branch having the mist fall upon them."

Author: Marilyn Pokorney
Freelance writer of science, nature, animals and the environment.

Wednesday, April 7, 2010

Botanical Garden - Trees And Shades


A quiet corner in the Botanical Garden in Porto Alegre, southern Brazil. Ideal for a lazy walk on a Sunday morning.
Like any other botanical garden, it shows a variety of scientifically documented native regional plants, and spreads over an area of 39ha. It is ranked among the top five Brazilian botanical gardens.


Tuesday, April 6, 2010

Flowers For the Garden


You may want something like this for your garden.


Or you would rather have only a flower bush like this one.

Friday, April 2, 2010

Plant a Tree in Early Spring

Thinking of planting one tree? Or maybe more? Then early spring is the ideal time to do that as your tree will have plenty of good weather conditions - ideally - to grow.

Besides, you will have to be careful as to soil preparation since this is a crucial element for your task success. The following steps are a must:

  • dig a hole 2 feet deep and at least 1 foot wider each way than the full spread of the roots. The bottom of the hole should be broken up with a pitchfork and thoroughly mixed with peat, leaf mould, loam, etc.;
  • manure should be used sparingly and only on the top of the hole as it burns the roots. The deeper you can cultivate your hole, the better for your tree. Once it is planted, you can cultivate around it but not under the roots;
  • having filled the hole to the depth required by the roots of the plant, flood it with water to settle the soil at the bottom; when this has drained away, place the tree in the position in which it is to grow and settle the soil about it;
  • after the tree is planted, cutting back is proper. Cut back sharply at least one-third, pruning the branches. It is necessary to brace the tree with wire ropes so that the roots will not be broken by the wind. Use a single wire around the trunk and three guy wires;

  • for the first year after planting, the more cultivation you can do the better. Keep weeds away, too, with straw or mulch, and straw manure mulch in the spring and fall will help keep the moisture in the ground.(Source: Hege Crowton - www.ezinecrow.com
 By planting a single tree or more, you will be adding to the UN The Billion Tree Campaign which has already reached the staggering figure of 7.4 billion trees worldwide. Quoting  Prof. Wangari
Maathai, founder of the Green Belt Movement and 2004 Nobel Peace Prize LaureateWhen we plant trees, we plant the seeds of peace and seeds of hope.”

Wednesday, March 31, 2010

For a Greener World


The post below has been published already but I believe the idea must be reinforced and more people should have the chance to read it and get involved.

By the end of 2009 7.4 billion trees had been planted under the UN campaign by participants in 170 countries. In 2010,the International Year of Biodiversity, we may go farther and plant many more.

That's why I am inviting you all - family, friends, followers, readers at large - to grow green and join The Billion Tree Campaign, a United Nations Environment Programme. It is our duty to do something really meaningful for Mother Earth. And what could be more meaningful than trying to make up for all the damage we have caused to the planet? By planting a tree - a single tree - we may make a world of difference today and ensure that the next generations will be able to enjoy greener landscapes. So I challenge you all to plant at least one tree per month. It's not that difficult. What we need is to take action...NOW.


Let's get started. Go plant your tree! Click on the link to learn more about it.
 

Monday, March 29, 2010

Annuals or Perennials for Your Garden


The choice between annual or perennial plants for the garden may be solely economical. However, there are other factors to be taken into account, depending on the time you can dedicate to gardening or to the type of garden you want to grow. Linda Jenkinson gives us some ideas on the topic, and hopefully, after reading them, you will be able to make your own decision.


Do You Need Annuals or Perennials for your Garden?
by: Linda Jenkinson*

The crocus delights us in early spring as it dares to peek through the snow and lift its face to the sun. Soon after follow tulips, narcissus, iris, lilacs… all perennials that welcome spring with vibrant color and fragrance. Perennial plants bloom at different times during the growing season and delight you with variety in color and size from earliest spring to late autumn. However, many perennials like those mentioned, bloom only for a few short weeks and then disappear from the landscape until the following year.

Annual plants provide a garden with continuous bloom and color throughout the summer. The “mission” of an annual is to produce seed. Seeds sprout, foliage grows, flowers bloom and then the plant goes to seed. When the annual completes its mission, the entire plant— flower, foliage, and root system —dies.

Some annuals have a very short life span and depending upon when they are planted, may reseed and go through two or more growing cycles per season. Other annual plants grow continuously from spring planting until the first frost of autumn.

Since annual plants die completely at season end, they need to be replaced yearly. Depending on the cultivar, annual seeds can be planted directly into a garden or sprouted indoors for transplanting when weather conditions and soil temperatures are right for growth.

Annual transplants are also available each spring at gardening centers and many are sold in inexpensive flats that contain four or more plants. Annual plants can often be closely grouped to fill in barren areas of your landscape whereas perennials often need space to multiply and/or to grow to maturity. 


* Linda is leading author of GardeningGuides.com -Your place for information on gardening topics and free e-books .
 

Saturday, March 27, 2010

Earth Hour 2010

This Saturday at 8:30 PM everyone is invited to swith off their lights for one hour in order to join the worldwide movement EARTH HOUR  2010. According to the WWF website " millions of people, 1000s of cities and globally famous monuments will all switch off their lights for just 1 hour in a symbolic show of support for our one and only planet."

According to a WWF spokesperson, this year's Earth Hour will involve more  people than in 2009 when hundreds of millions of people from 88 countries switched their lights to cast their Vote for Earth.

You and I can make a difference. It is our way of telling world leaders that they must listen to our planet's demands and needs.

Gardening Tips - Part Four

 For a couple of days we have been looking at some useful gardening tips that may help you either get started with gardening or improve your already seasoned skills. Whichever the case, you will surely enjoy the tips organized by Hege Crowton as they remind us of the simple basic principles every gardener should be aware of. 
15. Avoid putting too much mulch on tree trunks; this would encourage unwanted pests to reside on them.

16. Use plant varieties that are common to your area or have been taken from an area with similar conditions.

17. Be sure to know the plants that are poisonous. If you are intent on growing them, make sure to have the necessary cure available in your household. Take note of this gardening tip, it can save your life.

18. The best time to water plants is during mornings.

19. Before planting a new plant in your garden, you must consider its height and size when it matures. This garden tip can help you save money in the future.

20. Newly transplanted plants may require special attention during its first week. This is to reduce the stress and shock it got during transplantation.

And last but not the least of the gardening tips...

21.Plants are living entities. If you want them to grow in your garden you have to treat them as such. They need to be taken care of. They are like your pets, you look out for them. In return you get that feeling of contentment watching them thrive.

A good way to take care of them is to consider that plants might have some feelings too. 


Thursday, March 25, 2010

For a Greener World


 You are invited to stand up and join "For a Greener World".

I am inviting you all - family, friends, followers, readers at large - to grow green and join The Billion Tree Campaign, a United Nations Environment Programme. It is our duty to do something really meaningful for Mother Earth. And what could be more meaningful than trying to make up for all the damage we have caused to the planet? By planting a tree - a single tree - we may make a world of difference today and ensure that the next generations will be able to enjoy greener landscapes. So I challenge you all to plant at least one tree per month. It's not that difficult. What we need is to take action...NOW.


Let's get started. Go plant your tree!

Wednesday, March 24, 2010

Flowers and Other Garden Plants - Part Three


 This is the third part of GARDENING TIPS by Hege Crowton. Some of the tips may sound like obvious to the advanced gardener, but they are important to be remembered, especially if you do not have much practice. Check them out below:

10.Flowers are beautiful, but they are also expensive. Get one that is resistant to many elements. Flowers from your local community already have developed resistance to conditions present in your area.

11.For most garden plants, their roots go only as deep as 6 inches. Putting fertilizer deeper than that would be a waste of money. Put them shallower as they seep down when the plants are being watered.

12.Earthworms are important to plants. They till and aerate the soil for the roots to breathe. Non-organic fertilizers can kill them. This gardening tip dates back to the old days of gardening.

13. Having several kinds of insects that are beneficial to your garden would be good. These insects can be encouraged to stay by having diverse plants in your garden.

14. Spot spraying weeds with household vinegar, instead of using commercial weed-killers, can eradicate them. This is another environment friendly gardening tip. 


Tuesday, March 23, 2010

Basil in the Garden


Basil will add to your garden with its good-smelling leaves. Plant it in pots along with other herbs or in a garden corner next to taller species.

Gardening Tips - Part Two

  
This is the second part of Hege Crowton's article. Check it out for handy details:

5. There are several plants that are only suitable for a specified climate, a certain kind of soil or can only grow with certain plants. You have to know what plant grow in the conditions you have in your area this is for you to avoid unnecessary purchases. This is a money saving gardening tip.

6.Landscaping is a good investment which can double the value of your home. This is one gardening tip that can earn you money.

7. Growing grass on bare ground is an easy way to make your home look better and appreciate in value. This is one gardening tip that promotes earning money while growing grass legally.

8. Aside from looking great in your home, trees also provide some sort of protection from direct sunlight exposure and strong winds.

9. Vines on the walls, fences and overhead structures also would offer some protection and would also look great. 

Sunday, March 21, 2010

BOUGAINVILLEAS ON THE ROOF


Bougainvilleas are naturally beautiful and are able to leave any corner of your garden just gorgeous. Like this roof:

GARDENING TIPS - Part One


Whether you are a newbie at gardening or a pro, the following tips will certainly be handy. The post below is part of an article written by Hege Crowton, an expert copywriter,who is known for doing in-depth research before writing her articles.


"Gardens come in different varieties like the plants you find in them. There are several gardening tips that can be used for all types of gardens.

1.Mulching protects your garden topsoil from being blown away. It also provides nutrients as it decomposes and improves the appearance of your gardens. Mulching has other benefits and is one of the most recommended gardening tips by gardeners and farmers alike.

2.Healthy plants are more disease resistant. Plants are like people, a person with a strong immune system can combat diseases. A healthy plant does the same.

3. Pests can be eradicated by cleaning the plant with a watery solution of soap. Just make sure to rinse after. This gardening tip is best heeded for fruit bearing trees or edible plants.

4. Using compost fertilizers are a great way to have healthy plants. It is also a great way to save money on expensive fertilizers. Non -organic fertilizers also tend to leave chemical residues that can accumulate in garden soils and harm not only the plants but the gardeners as well. They cause toxins to go to the water supplies. Another gardening tip recommended not just by farmers and gardeners but also by environmentalists."

To learn more about composting, you may check out last Tuesday's post (March 16th).

Saturday, March 20, 2010

AZALEAS


Either grown in pots or in flowerbeds, azaleas will add to your garden.

Thursday, March 18, 2010

SUNFLOWERS BRING OUT JOY


Yellow looks just great in any garden. That's why sunflowers with their beautiful design will leave your place surprisingly joyful! Check out 03/03/2010 post for more ideas about flower types.

EASY STEPS TO COMPOSTING - Part Two

Too bad! Yesterday I failed to post the second part of Fran Barnwell's article on composting. Sorry, everyone! But here it goes; check out what she has to say about items that must not be used in composting.


"What NOT to compost:

- all meat products and bones; bread, cooked food - these will attract vermin
- dog or cat waste
- woody material - which takes too long to compost
- weeds - these can 'infect' your compost with their seeds
- anything that is non-biodegradable, such as plastic.

And because you won't always feel like taking a trip to the compost heap when it's wet or cold or every time you peel vegetables why not keep a lidded container by the back door which you can fill up and then make the trip to the compost bin every one or two days?

Over a period of time - 3 months to 1 year, depending on conditions - all this matter will have broken down into lovely dark brown crumbly compost, which you can fork into your beds and borders. It makes an excellent soil conditioner and can be used as surface mulch, helping conserve moisture and discourage weeds.

You can also convert fallen leaves into wonderful compost. Rake up any leaves from your lawn - you may have to do this several times over the autumn - and collect them from the borders. Put them all into a black waste sack, sprinkle with water, put a few holes around the sack with a fork, tie the top, and leave it in a corner for about a year. What you end up with is known as leaf-mould."
Fran Barnwell

About the author:
If you want step-by-step tips and advice to start gardening, you may sign up for her free ezine, or order her eBook 'The Ultimate Guide to Gardening for Beginners' at www.NewToGardening.com

Tuesday, March 16, 2010

EASY STEPS TO COMPOSTING - Part One

If you are environmentally-oriented, you know how important it is to recycle. The article I'm sharing with you today is exactly about that: recycling and, as a result, get good, safe fertilizer for your garden. Check what Fran Barnwell says about composting.

"It is becoming more and more obvious these days that we need to recycle as much as we can, and anyone with a garden has a head start and can make a great contribution. To many novice gardeners, including myself, this subject can be somewhat difficult to grasp; but in fact it is really straightforward - there are just a few very simple rules:

You need a compost bin, and the type you decide on rather depends on the size of your garden, but there are a couple of options:

A purpose built plastic bin purchased from a garden centre, not too expensive; and you just fill up from the top and a few months later, you can take compost from a small hatch at the base.
Alternatively, if you can wield a saw and some nails, you can make a wooden slatted enclosure, one metre square - or you can buy them ready made - and cover it with a piece of old carpet to keep the worst of the weather off.

What you can compost:

- all uncooked vegetable and fruit peelings
- teabags, tea leaves and coffee grounds
- egg shells
- dead flowers from the house
- and from the garden, soft prunings spent bedding plants, dead leaves, lawn mowings
- spent compost from hanging baskets or containers
- some dryer materials such as shredded paper, rabbit and guinea pig bedding.

The only thing you have to be careful about is to mix different types of material; if you have too many grass clippings in a big mass, they will turn soggy and slimy, or if there is too much paper and prunings, it will be too dry. So keep an eye on it, especially if you are using the wooden enclosure, and mix it with a fork occasionally."


In tomorrow's post, you will find the second part of this article.

Monday, March 15, 2010

HOW TO SUCCESSFULLY GROW ROSES - Part Two

Yesterday we learned the first five tips for successful rose planting...now we are looking into the other five that will ensure, if followed, great results. Check it out below:

6. Four weeks after planting, you should start soaking the bed every 2 weeks or so. You should do this in the morning for the best results.

7. Begin fertilization approximately 3 months after planting. Use 3-6 inches of mulch to control the moisture, temperature, and to stop weeds from coming up. Mulch also helps to lock in the vital nutrients your roses' need in order to remain healthy.

8. Planting in the Spring is the best.

9. You want to plant your roses in an area that is well circulated with air. Your roses will not grow in an enclosed or tight area.

10. Dig a hole that is two times bigger than the amount of space that your roses take up. It makes it easier to plant them and creates a spaced area for them to grow with freedom. Poor circulation for your roses can cause fungal diseases. Using a larger hole also makes it easier for you to pull them up later and pot them if you’d like.


About the author:
© 2004, Kathy Burns-Millyard and Garden-Source.com

This article is provided courtesy of http://www.Garden-Source.com-

Saturday, March 13, 2010

HOW TO SUCCESSFULLY GROW ROSES


Planting roses isn't actually complicated, as long as you have some good advice and tips to start with...

1. Check with your local gardening center or florist for the best type of roses to grow in you climate. If you are a novice, you should look fo? disease resistant types of roses because they require a lot less maintenance.

2. When planting roses, you want to pick a spot that is well lit in the morning. You also want an area that is sunlit for at least 6 hours a day. Roses need a great deal of light if they are to grow properly. If you live in a really hot climate though, you'll probably get the best results by not planting your roses in direct sunlight.

3. Pick an area that has plenty of well drained soil. Great soil has a PH level where the amount of acid in the soil is at about 5.5-7.0. You can get a testing kit for your soil at any garden center.

4. Organic matter like manure or lime helps to nourish the roots of your roses. You should soak the roots in water or puddle clay for many minutes, and cut off any root's ends that are broken.

5. The first 3-4 weeks after planting your roses, you should water them often. Usually this is when the top 2 inches of soil is dry. Roses need a lot of hydration and food to remain healthy.


About the author:
© 2004, Kathy Burns-Millyard and Garden-Source.com

This article is provided courtesy of http://www.Garden-Source.com

Friday, March 12, 2010

AN ENVIRONMENT FRIENDLY TIP ...

...to get rid of weeds

Yesterday you learned about "solarizing" as a way to get rid of weeds and save your garden, making sure that your efforts to grow nice plants will be rewarded. However, contrary to today's ecologically correct attitude,there are people who would rather use herbicides right away instead of trying other less aggressive solutions. I don't recommend this at all as you would damage the soil and your health as well. You should try spot-spraying weeds with household vinegar, instead of using commercial weed-killers, to eradicate them. This is an environment-friendly gardening tip to be adopted.

Thursday, March 11, 2010

HOW TO DESTROY WEEDS

Before weeds destroy your garden, you should destroy them. :) It's no fun at all to see those beautiful, carefully chosen plants being suffocated by undesired grass. Let's take a look at some of the techniques recommended by Peter Selkin:

Solarizing

One of the most effective ways to destroy weeds in a new garden is to solarize them down. It is actually quite simple. Using just a sheet of clear plastic, capture the sun's heat and literally cook the weeds and their seeds until they are dead. This will take a couple of weeks in sunny climates. If your garden is in a cooler or cloudy region, try this technique during the more sunny times of the year and allow a good 8 weeks for the process to work. Here's the steps to successfully execute this strategy:

1. Mow the ground as close as possible to remove as much of the plants as possible. The best terrain for this technique is bare ground.
2. Make the soil damp. The process will be accelerated by moisture.
3. Take a sheet of thick, clear plastic over the entire area as tightly as possible and then fasten it down with heavy stones.
4. In order to keep in as much heat as possible, seal off the edges by covering all the way around with soil or pieces of wood.

Try not to till the soil after you have solarized since it often brings new seeds to the surface. When the soil gets really hot, this process will also destroy many forms of soil dwelling pests and diseases.


Article Source: http://EzineArticles.com/?expert=Peter_Selkin